Dissatisfied by the look of my collar and cuff points, I searched for an easy way to achieve pointy points.
My "technique" was inspired by this tutorial from Off The Cuff blog.
I tried a few times, but each time the thread "escaped".
So here is what I'm doing now ; once my collar/cuff is sewn and the angle cut, before turning it, I put a pin just at the angle, between the two layers, then turn it inside out (careful with the fingers), and pull on the pin. The head is caught by the seam, but it's so tiny that it "pushes" well into the corner. And then I remove my pin.
For the photo, I used a "big" pin, for the purposes of demonstration only.
Of course I could buy a point turning tool, if only I could find one here. (and not pay 15$ in shipping costs)
Affichage des articles dont le libellé est technique. Afficher tous les articles
10/05/2014
14/12/2013
Unorthodox quilt finishing method - Lazy, and machine friendly.
Professional, dedicated, and serious quilters, please go away now.
I hate bias. And I don't like hand stitching much either.
Finishing a quilt with a hand stitched bias ? Nope. No, no. Do not insist, please.
So, if you don't care about traditional quilting, and think that, either way, your quilt will be loved (and warm) all the same, here's how I do it.
Considering your backing and batting have to be about 10cm (4") larger than your top, once your quilting is done, cut your batting at the same size as your top, and cut your backing about 2.5cm (1") larger than your top.
(see where I'm going ?)
Fold twice this edge over your top, and top-stitch. From the top point of view, it seems you have a bias finishing.
With this technique, you have to make sure your backing "suits" your top. No hiding a cheap/ugly backing.
I hate bias. And I don't like hand stitching much either.
Finishing a quilt with a hand stitched bias ? Nope. No, no. Do not insist, please.
So, if you don't care about traditional quilting, and think that, either way, your quilt will be loved (and warm) all the same, here's how I do it.
Considering your backing and batting have to be about 10cm (4") larger than your top, once your quilting is done, cut your batting at the same size as your top, and cut your backing about 2.5cm (1") larger than your top.
(see where I'm going ?)
Fold twice this edge over your top, and top-stitch. From the top point of view, it seems you have a bias finishing.
With this technique, you have to make sure your backing "suits" your top. No hiding a cheap/ugly backing.
13/02/2013
Finishing technique : facing with bias tape
I first used this technique for some armhole finishings on a sleeveless shirt a while back during training in a garment factory.
It's really easy and quick to do (hence used in the RTW process).
I also used it on a knit fabric, for a garment that didn't need stretch on the edges. (but I could have used a stretch bias tape)
It's really easy and quick to do (hence used in the RTW process).
What it looks like, on a garment. (you can see it on the left, on the peplums' edges)
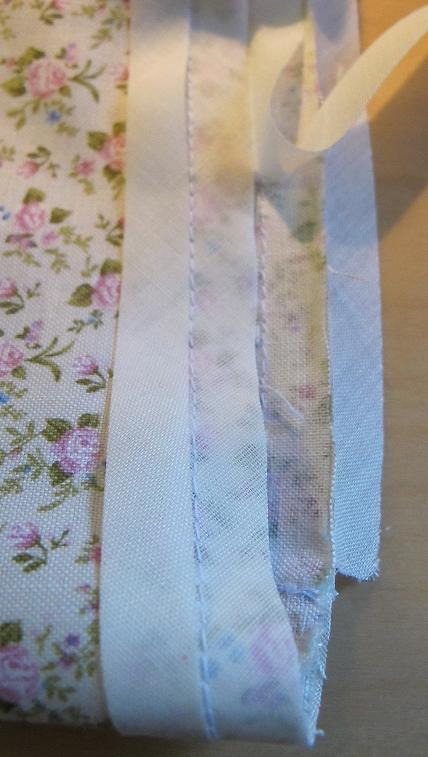
I used a retail 4cm bias tape folded in 4. Ideally a self-fabric bias tape is better, because this kind of finishing requires to fold in 3, whereas retail bias is folded in 4.
As the folds of my bias are 1cm, I let a 1cm seam allowance. I put my bias on the edge on the right side and sew in the middle of the tape. Then I cut the external fold of my bias (you don't have to do this if you use self-fabric bias).
Turn your bias on the wrong side, press, and stitch at 1mm.
I choose to use this technique on this blouse because the fabric is a bit too light for large facings, as the pattern was initially designed, and also because it has rounded edges, and I didn't see myself hemstitching them. (nervously, I couldn't)
Inscription à :
Articles (Atom)